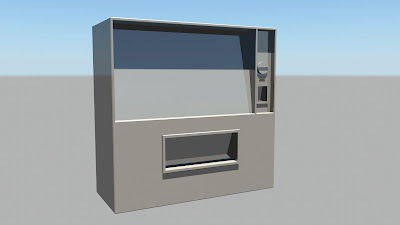
These assets are:
. Bins
. Seating
. Drinks Vendor
. Ticket Vendor
. Ticket Terminals
. Escalator
I will use Maya to build each asset based from my blueprint designs. I will then UV map them accordingly and apply colour using Photoshop CS5.
Firstly here are my blueprints from my BA7 research document, so I have a basis for my modelling process:
The only assets I haven't made blueprints for are my ticket vendor and escalator set. However, I had already a good indication of how I wanted them to look and because I work better building than drawing, I went for it.
Firstly I modelled my ticket vendor. I wanted this machine to be as simple as the drinks vendor and also have an interactive touch screen function. In doing so I will be able to maintain the futuristic theme throughout my environment. I made the machine very basic in shape as to also fit in with the visual style of the theme. I then constructed and large angular 'screen' in the center of the object. I extruded various parts of the model for the collection slot and payment area. I also did a 2 segment bevel on some edging of focal areas in the model just to add a nicer finish. After the modelling process was complete, I then added a checker colour file over the machine so I could see the UV efficiency.
I then decided to use automatic mapping as I personally prefer using this method of UV mapping on simple shapes. I am able to see all my fine details and piece them together efficiently and effectively. I did look into using a UV unwrapping program such as 'Silo', However, I figured it not a learning process if I let a program doing it for me. Also, I haven't UV mapped and applied colour/texture since my door project in my first year. I think it is important for me to refresh my mapping skills and improve my techniques.
Here are the UVs for my ticket vendor by using the automatic mapping function. I could see all the different pieces and able to identify what pieces can be linked together. It is quite a length process, but in doing so I am able confidently improve my skills and understand the importance of sewing my mesh together properly.
Here are my UVs after I sewed everything together. As we can see I have perfectly unwrapped and gathered the mesh of my ticket vendor. I am now ready to take UV snap shot and start applying colour using Photoshop. Before I do so, I set my aspect ratio to 1024x1024 and saved it as a targa file. This is so my UV snapshot will be at a good pixel ratio so the colours/texture won't blur.
Using Photoshop, I imported my targa file and using the magic wand tool, I selected the areas in which I wanted to apply colour. To match the theme of my environment, I made up the ticket vendor with 2 different shades of blue. Dark blue for the main structure and payment point, light blue for the surrounding screen and surface background of the payment point. This is how I 'use' colour to highlight focal areas on the model. Lastly I added some text to the center point of the screen highlighting an 'interactive' instruction for the user. I also added a embossed 'push' font to the collection point screen. After I finished colour my UV map, I then saved the filed again as a targa and added it to my model in Maya. I did this by using the selection box next to colour on the material attributes on my object. I then chose 'file' then imported my UV colour map.
However, I noticed the text on my model was quite blurry and did not look good at all. I then decided to take it back into Photoshop to see if I could rectify the problem.
I checked the image size and settings. I soon realized the DPI was set to 70 instead of 300. I change the settings accordingly, saved my targa file again then imported it back onto my model in Maya.
Here are some test shots of my models using a sun illumination setting in mental ray:
 |
| without colour UVs |
 |
| with colour UVs |


No comments:
Post a Comment